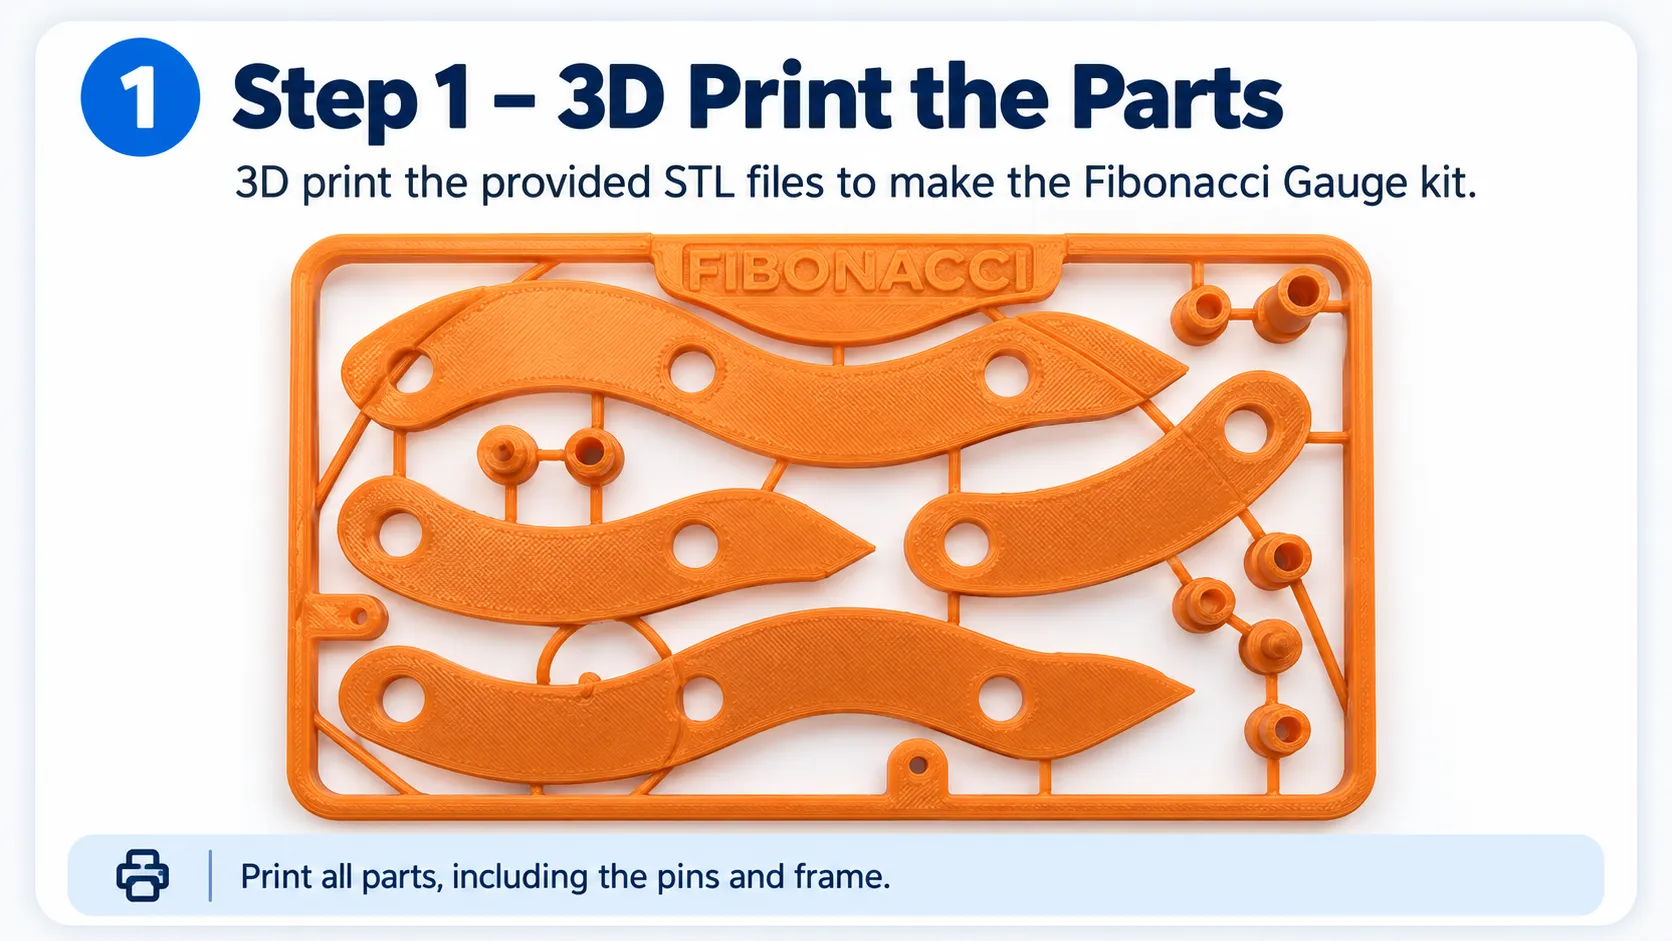
Step 1: 3D Print the Fibonacci Gauge
Fibunacci.stlDownload
Step 2: Prepare the 3D-Printed Parts
Step 3: Arrange the Arms
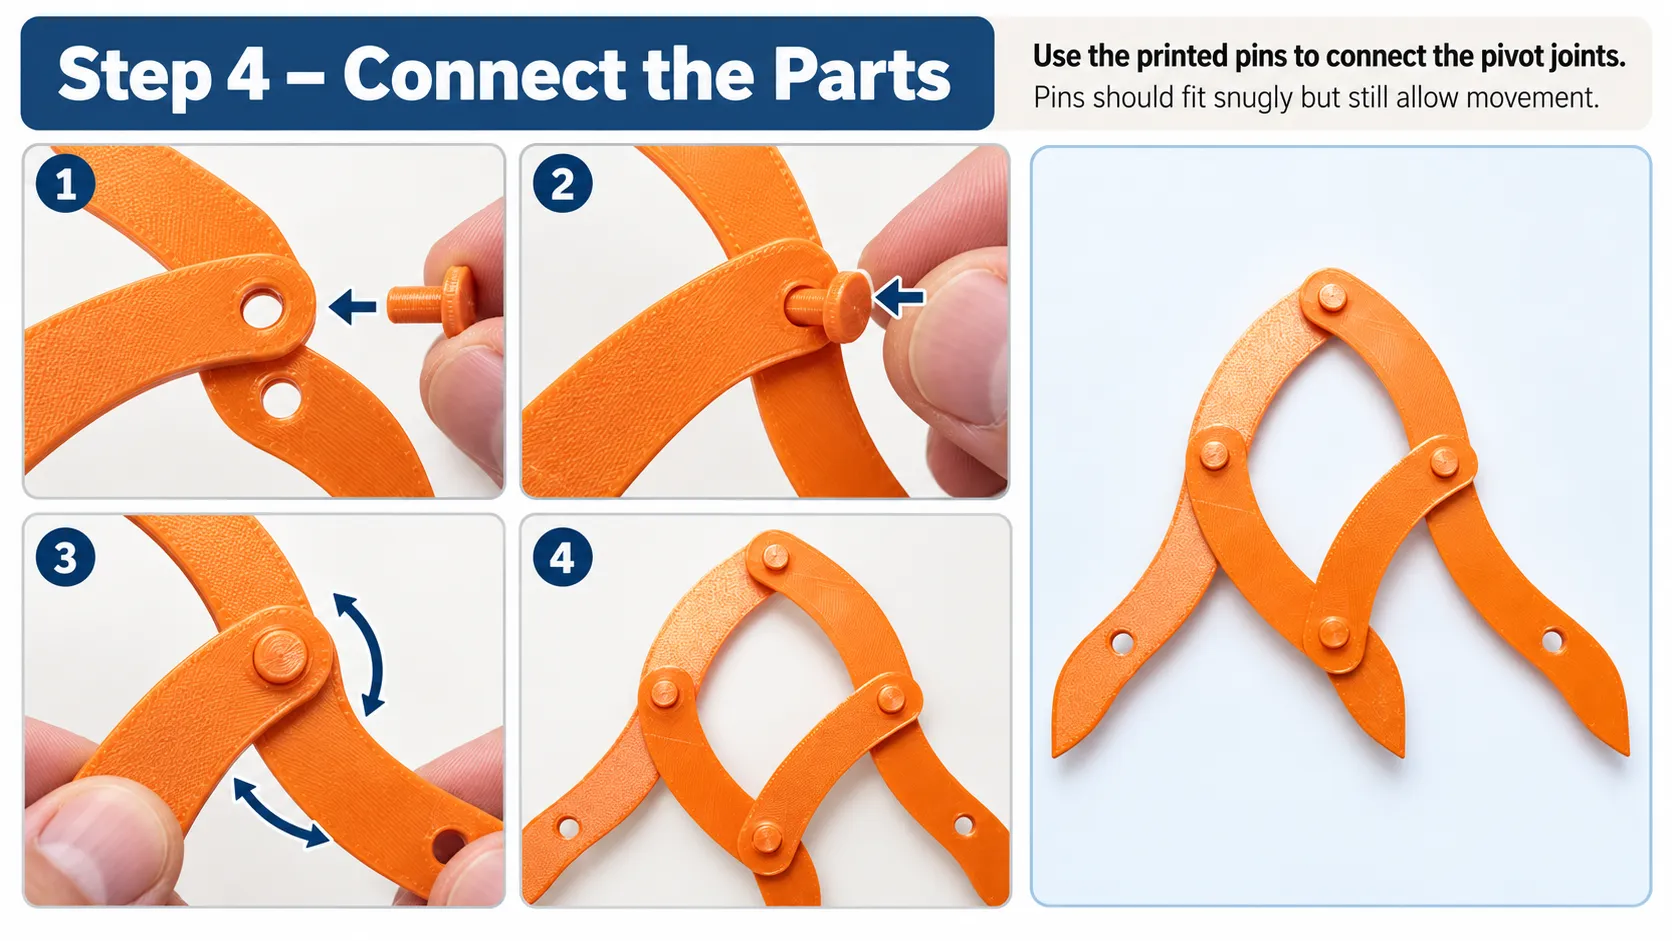
Step 4: Connect the Parts
Step 5: Test the Fibonacci Gauge

Published builds from the RoboticGen community — featured picks first.
Download the provided STL files and import them into a 3D printing slicer, such as Ultimaker Cura or PrusaSlicer. Select the appropriate printer settings, generate the G-code, and print all the required components, including the arms and connection pins.
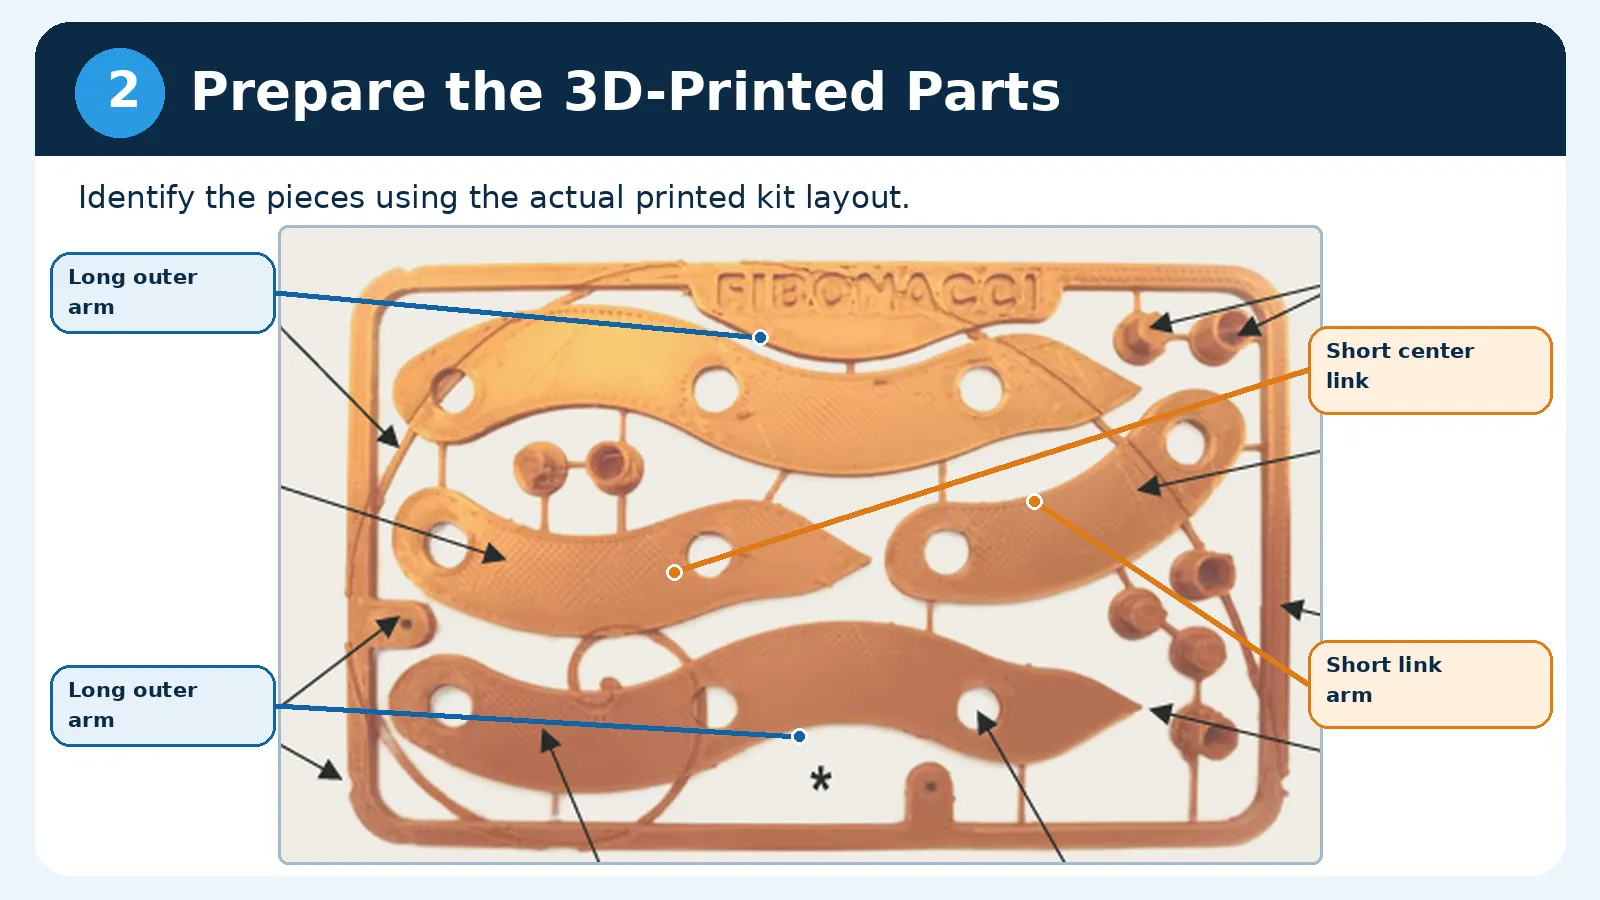
Carefully remove all the components from the 3D printing bed. Identify the two longer outer arms, two shorter inner arms, and connection pins. Remove any unwanted printing supports if necessary.
Place the two longer arms on the outside and the two shorter arms between them. Make sure all the measuring tips point in the same direction.
Use the provided 3D-printed pins to connect the arms at their pivot joints. Ensure the connections are secure while allowing the arms to move freely.
Gently open and close the gauge. Observe how the arms move together while maintaining approximately the same proportional relationship between the measuring tips.
Place the gauge on the provided calibration card. Align the outer measuring tips with the marked outer points and check whether the middle measuring tip reaches the Golden Ratio reference point.
Use your completed Fibonacci Gauge to compare the proportions of everyday objects, such as books, smartphones, and picture frames. Discover which objects have proportions closest to the Golden Ratio (1.618)!